How to Enable Custom Robots Header Tags in Blogger
 |
| Custom Robots Header Tags |
Along with custom robots.txt, Blogger also provides you with the option to set specific rules for web crawlers for individual page types (homepage, archive, search, posts and pages) with custom robots header tags.
Here’s how you can setup the Custom Robots Header Tags with the optimal settings:
NEW INTERFACE
Turn on the “Enable custom robots header tags” option, which you will find just under the “Custom robots.txt” option.

Then click on Home page tags and configure it as shown below in the screenshot.
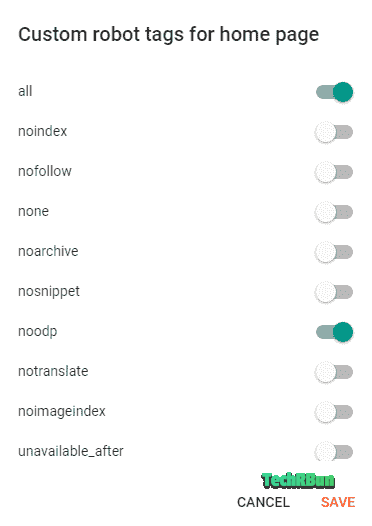
Hit the SAVE button.
Next click on “Archive and search page tags” and configure it as shown below and hit SAVE.

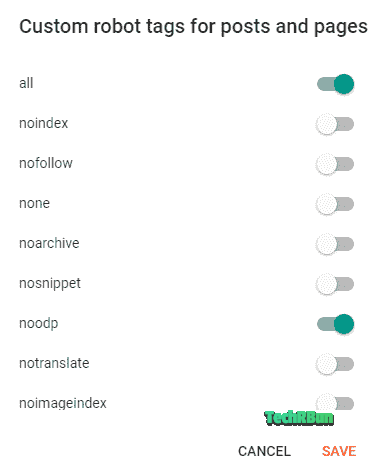
Finally, configure the “Post and page tags” and save it.
OLD INTERFACE
In the old (legacy) interface of Blogger, you will find the “Custom robots header tags” just after the “Custom robots.txt” option.
Click on the edit button next to the “Custom robots header tags” option and configure it as shown in the screenshot below:
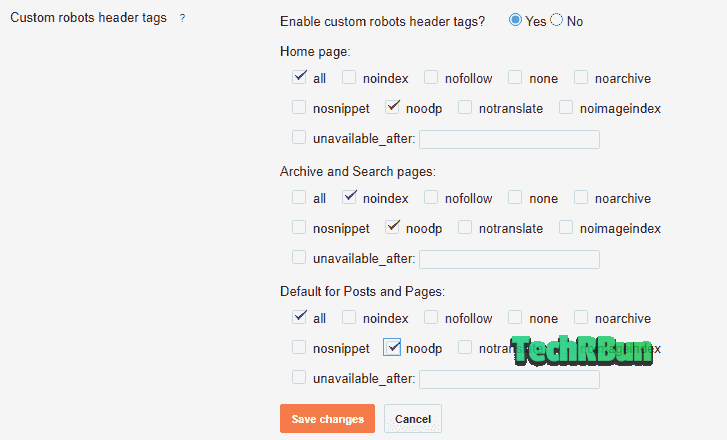
Click on Save changes.
That’s It!
Don’t forget to share this article on your favourite social media if you liked it. Feel free to comment down below if you have any confusions or doubts.
Talk to you again, soon. Have a great day ahead!